In this post I am going to give you a LITTLE rundown of what goes into Printmaking.
To define printmaking: It is creating an image using a wax (or other material) coating over a metal/glass plate, cutting into the coating with a etching needle, dipping (etching) the plate in acid (ferric chloride) then inking it and running it through a press to create an image.
To define printmaking: It is creating an image using a wax (or other material) coating over a metal/glass plate, cutting into the coating with a etching needle, dipping (etching) the plate in acid (ferric chloride) then inking it and running it through a press to create an image.
First is the 4 basic techniques to printmaking:
#1 Dry Point
This involves no ground (coating) or acid hence the name DRY point.
You use a etching pen to cut directly into the copper (we use roofing copper)


#3 Hard ground
In this we use a floor wax coating which does remain hard.
It is good for stenciling things and getting very hard clear straight lines, or gentle curves.


All the processes above were only done once per plate. For our main projects we have to do 3 of those processes.
#1 Dry Point
This involves no ground (coating) or acid hence the name DRY point.
You use a etching pen to cut directly into the copper (we use roofing copper)

As you might be able to see (if enlarged) the edges are jagged (due to the grain) and it is hard to get smooth, crisp clear lines.
#2 Soft ground
We put something like a dry brown glue coating on the plate using a roller and a hot plate to melt the coating evenly across the plate.
The reason it is called soft ground is because it does not harden, but rather is soft enough for you to make imprints of things on it. It is not good for drawing unless you are SUPER careful not to leave fingerprints on it. It is very sensitive.

#3 Hard ground
In this we use a floor wax coating which does remain hard.
It is good for stenciling things and getting very hard clear straight lines, or gentle curves.

#4 Aquatint
Which is a misleading name because it is actually golden rosin dust.
We mix up the dust by blowing air into the box and then put our plates in to let them get coated.
After coating we take it to the hot plate where the rosin melts into TINY beads across the plate.
With a mix of stop outs you can get different tones and values on your plate.

For my first one I did a hardground to draw outlines of my image,
aquatint (as seen below) and then dry point.
Dry point gives you fuzzy jagged lines
Soft ground gives you very thin but semi soft lines
Hard ground five you think crisp clear lines
Aquatint give you values
What you see below is my aquatint with red rosin stop-out.
To explain what a stop-out is I should give you an idea of the process.
1) Choose image
2) Cut copper plate down to the size you want ie. 4x6 or 5x7 etc
3) Degrease plate with soap & 600 grade sandpaper (grounds will not stick to oily spots)
4) Put coating (ground) on plate, the time for this can vary from 10-20 minutes to do
5) Let dry (hard ground) , cool (soft ground) or melt (aquatint)
6) Make imprint or draw on ground (for soft & hard only)
7) Etch, this consists of putting tape on the back of your plate and dipping it in Ferric Chloride for anywhere between 30 seconds to 40 minutes
8)Take out, rinse
9) Use alcohol, acetone or a variety of other chemicals to remove ground from plate
10) Put on next ground (normally aquatint) (skipping the melting process)
11) Figure out values, etch 30 seconds
12)Take out, rinse off
13) Put red rosin (or other stop-out) on plate
This is a coating that you paint on with a paintbrush to keep the ferric chloride from etching that area of the image
14) let dry for 15 minutes
15) tape back
16) etch
(repeat steps 12-16 another 4-5 times, adding time each time until desired darkness)
Below is what it looks like with an aquatint and red rosin towards the end of the process.

Then there is the printing process
1) Let paper soak 10mins-1 hour (depending on brand)
2) Ink plate with scrap matte board (very stiff cardboard like material)
3) Scrape off excess ink with more matte board
4) Use tarlatin (cheese cloth) to wipe ink evenly across plate without leaving weird marks
5) Clean edges
6) Line up copper plate & paper carefully on a sheet of acetate on the press
7) blankets down, check pressure settings on the press
8) roll the paper through, open up, carefully pull paper off and you have an image!
9) Now repeat this 8+ times!
And you get this:


And more rosin


And then the final image:

Sorry if this was super boring and if you got lost.
I tried to dumb it down as best as I could.
Kudos to you if you read it all.
Anyway this is a pretty fun class, if you're in college and like art even a little bit, you should take it. It is a lot of fun and you learn TONS.
Hope you enjoyed it.
I know my images aren't all that great, but hey I'm a "baby" print maker (it is what the advanced classes call us).

Then there is the printing process
1) Let paper soak 10mins-1 hour (depending on brand)
2) Ink plate with scrap matte board (very stiff cardboard like material)
3) Scrape off excess ink with more matte board
4) Use tarlatin (cheese cloth) to wipe ink evenly across plate without leaving weird marks
5) Clean edges
6) Line up copper plate & paper carefully on a sheet of acetate on the press
7) blankets down, check pressure settings on the press
8) roll the paper through, open up, carefully pull paper off and you have an image!
9) Now repeat this 8+ times!
And you get this:

To give you an idea of ALL the little detail it take in doing red and white rosin, here is a series of images adding red rosin each time:
(white rosin is more like paint, the thicker it is, the less it etches, the thinner it is the more it etches. Giving nice smooth change from light to dark, more paint like feeling)
Rosin!

And more rosin

And more rosin!

This is what the plate looks like after you remove the ground and rosin, before printing:
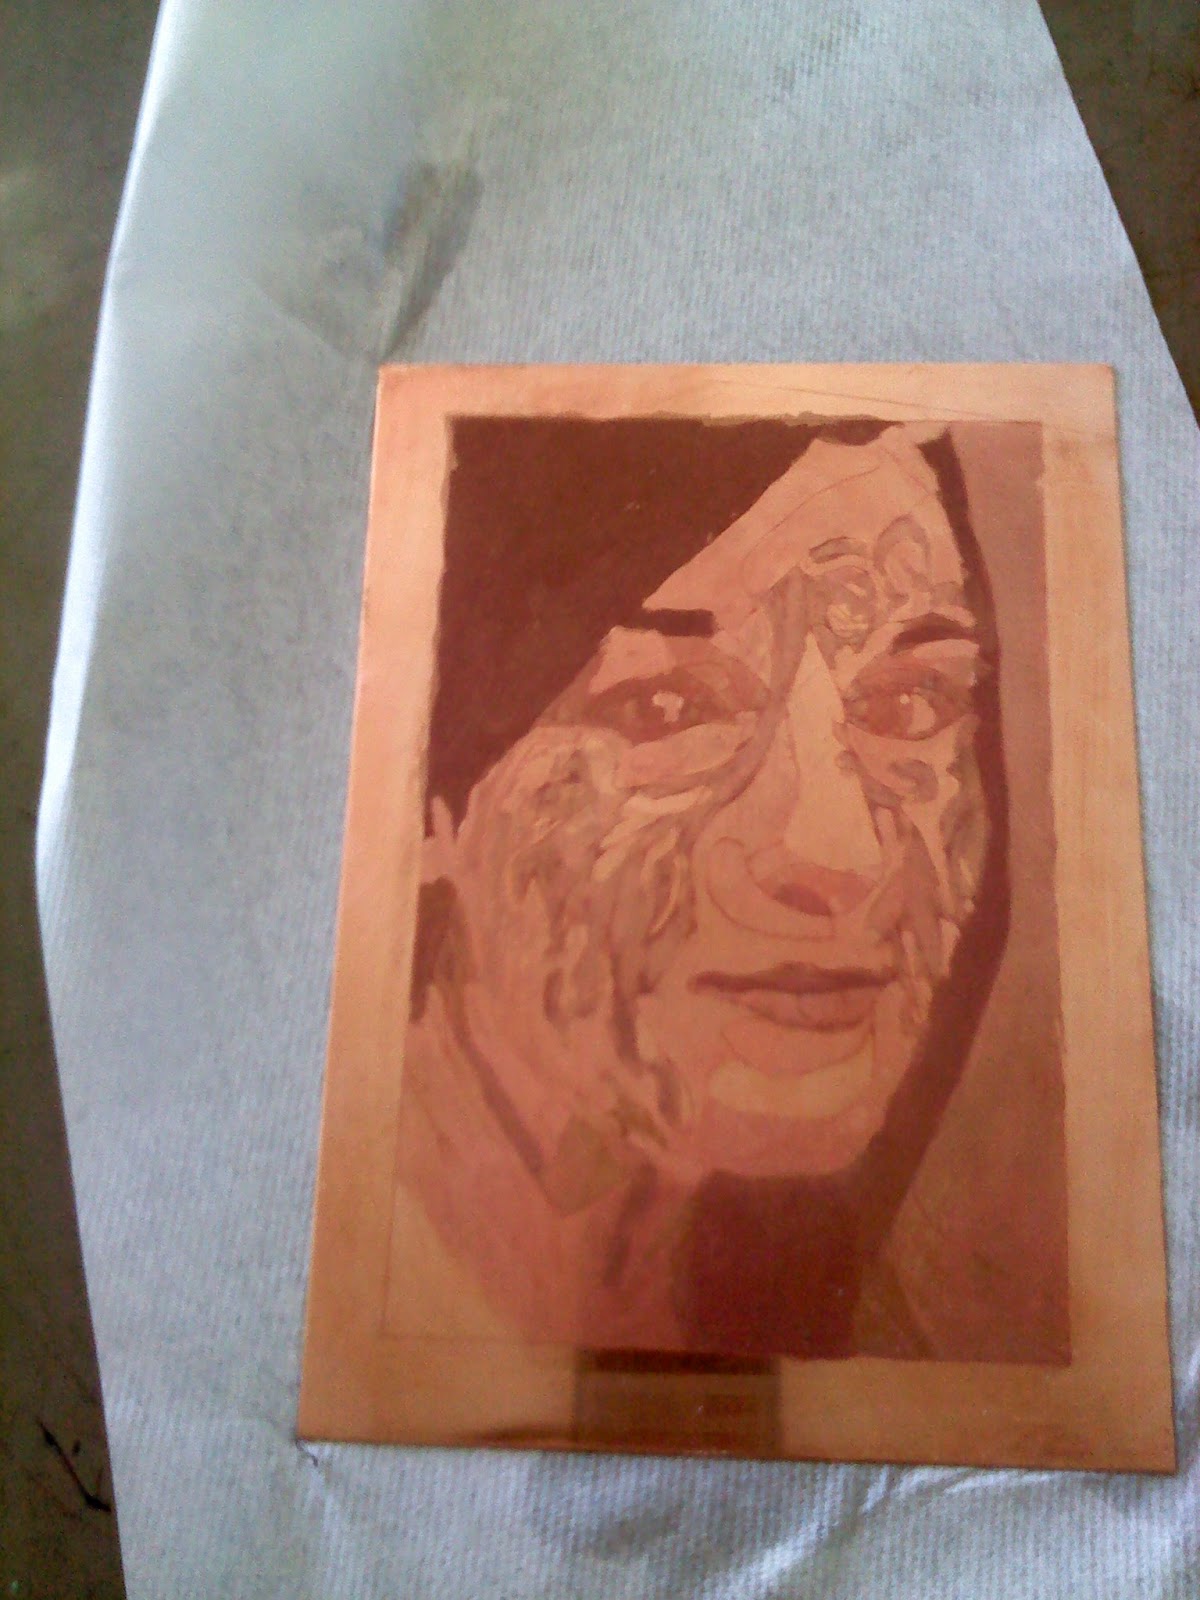
And then the final image:

I know that I only showed you 6 of my images but honestly I only have 9 total.
(In the process of one right now)
That may not sound like much but considering the last 3 have 3+ processes, these images easily take....4-5 (3 hour) class periods plus coming in on my own time on Fridays to work on them.
It is a good class to have a book to read in because there is lots of waiting to dry and etch time.Sorry if this was super boring and if you got lost.
I tried to dumb it down as best as I could.
Kudos to you if you read it all.
Anyway this is a pretty fun class, if you're in college and like art even a little bit, you should take it. It is a lot of fun and you learn TONS.
Hope you enjoyed it.
I know my images aren't all that great, but hey I'm a "baby" print maker (it is what the advanced classes call us).
Kudos is a strange word
Kudos Kudos Kudos
Kudos to you for writing such a long post to describe the awesome & fascinating process of printing! I really like the print job of you with your finger over your lips. Thanks for sharing :)
ReplyDelete